How to Draw a Christmas Tree: Super Simple Step-by-Step Guide
Hi! In this guide, I’ll show you exactly how to draw a Christmas tree, step by step.
This guide is perfect for beginners and takes just a few minutes for a simple tree but we’ll also explore advanced tips for detailed drawings, decorations, and full holiday scenes.
By the end, you’ll have a tree that looks festive, lively, and completely yours.
Drawing Supplies You’ll Need
Before starting, make sure you have:
- Pencil for sketching initial shapes
- Eraser for corrections
- Black pen or fineliner for clean outlines
- Markers, colored pencils, or crayons for coloring
- Optional: ruler for perfect triangles if needed
Tip: Keep your pencil strokes light. You can darken them after you finalize the shapes.
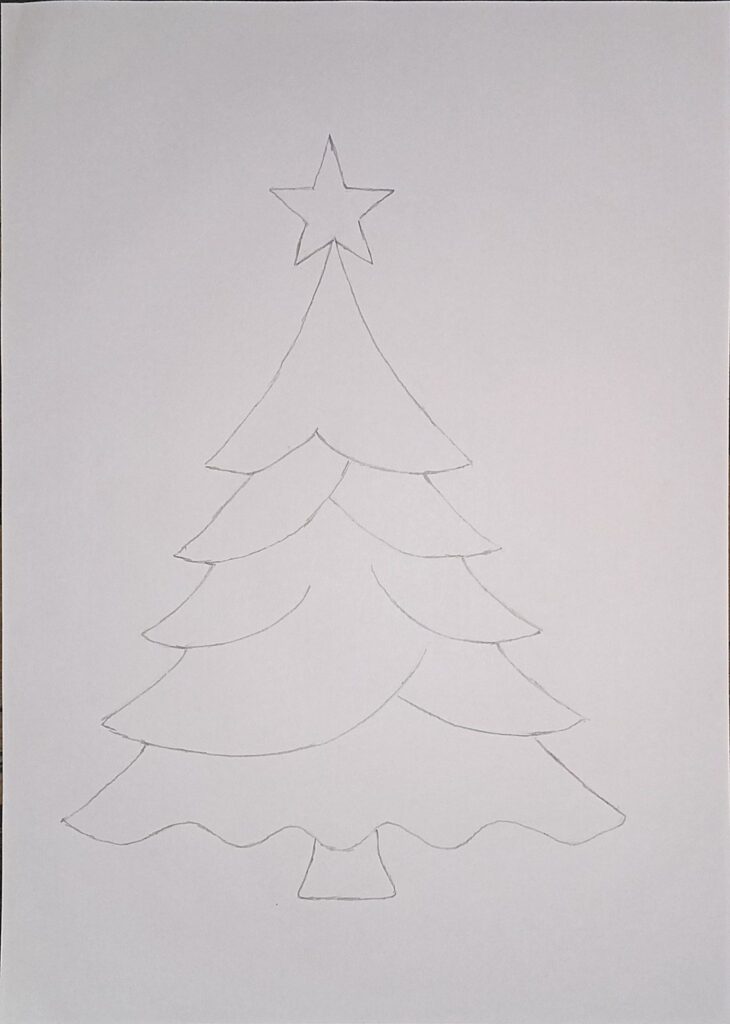
Step 1: Start with the Basic Shape
Every tree begins with a triangle. Don’t worry about perfect symmetry; it’s normal if it’s a bit uneven.
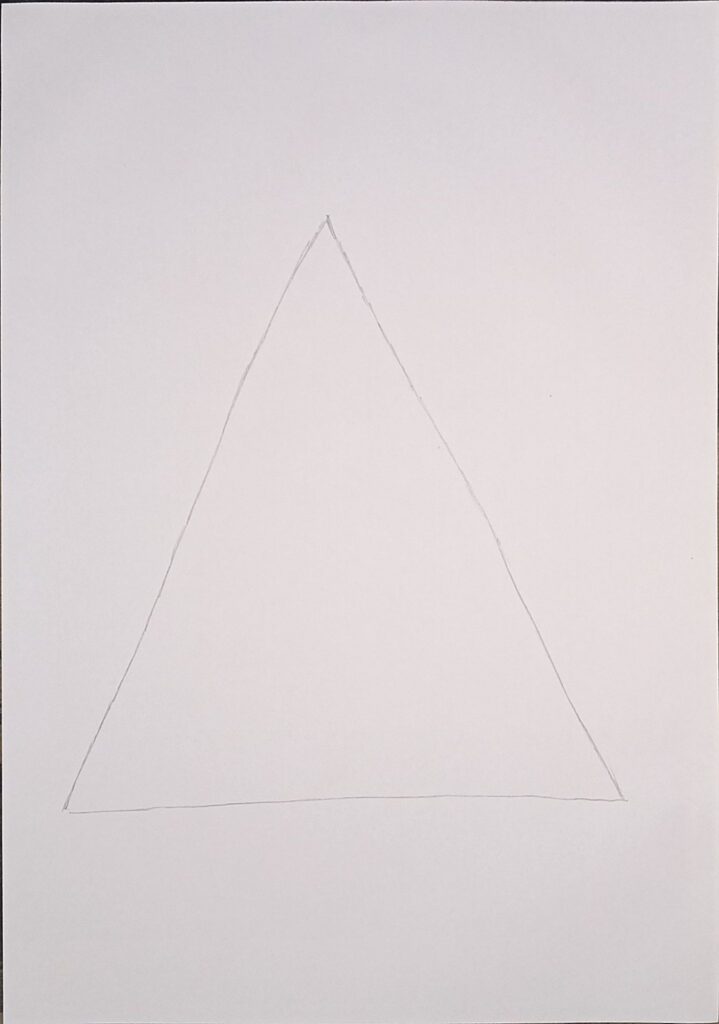
Draw a vertical line down the center to help guide the branches and decorations. This helps keep your tree balanced.
Mini Example: I once drew a tree without a center line, and it looked lopsided. Adding this guide in my next sketch made all my trees look much more professional even as a beginner.
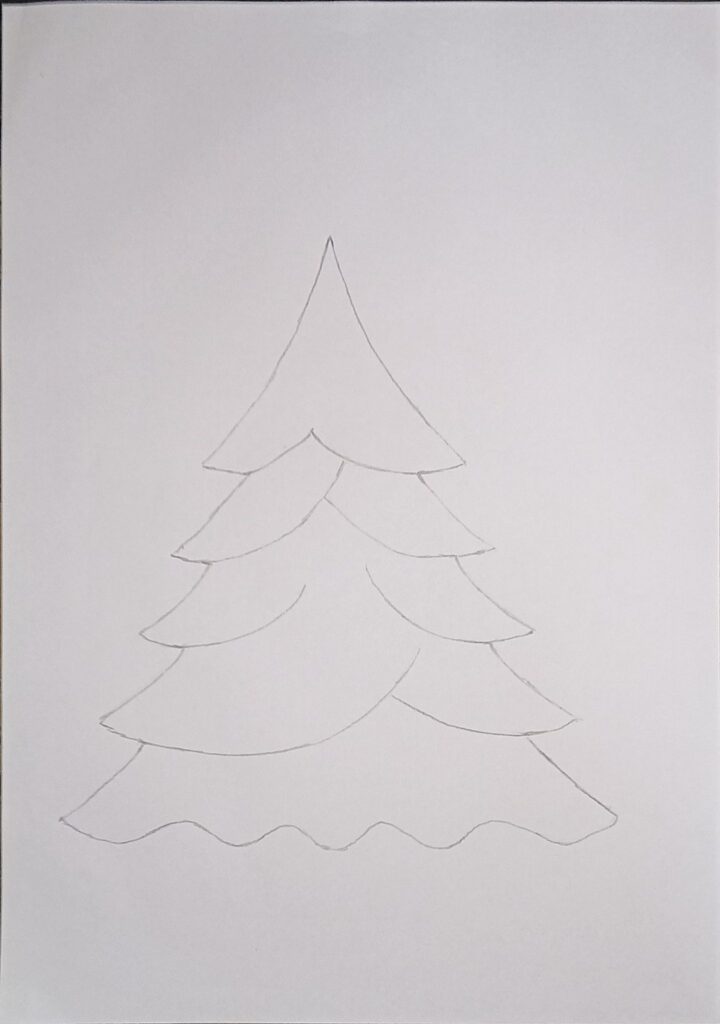
Step 2: Add Tree Layers
Divide your triangle into 2-3 horizontal sections to represent different layers of the tree.
- Top layer: narrowest
- Middle layer: medium width
- Bottom layer: widest
Adding layers gives the tree dimension and fullness.
Tip for beginners: Make each layer slightly wavy instead of perfectly straight—it looks more natural.
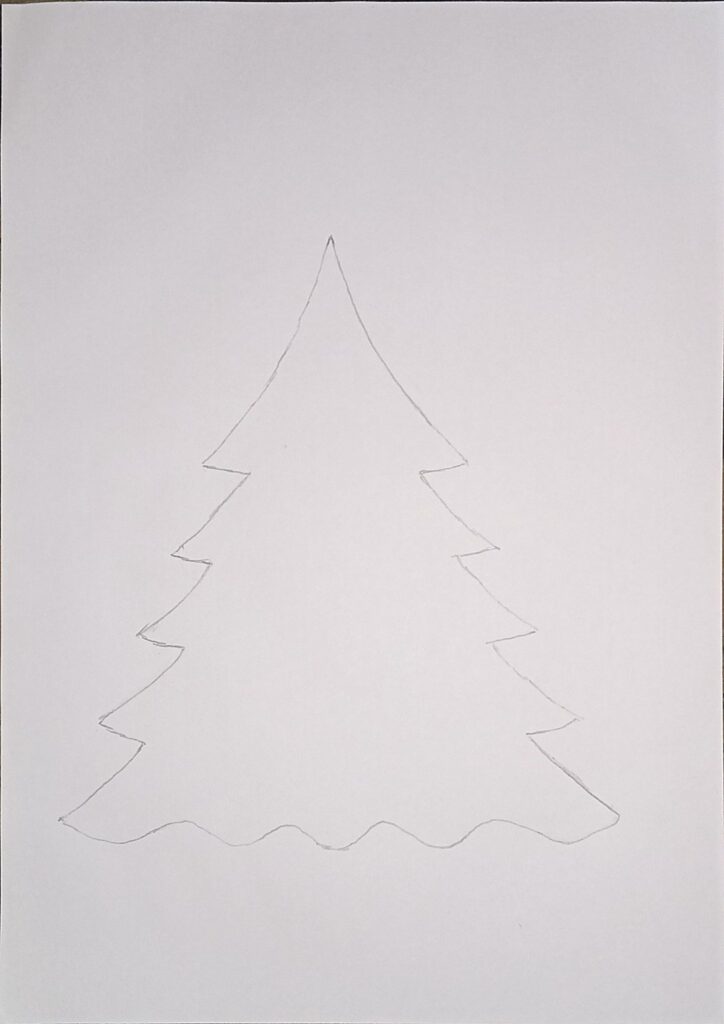
Step 3: Draw the Tree Outline
Follow the triangle and layers to sketch the outer edges of your tree.
- Make slightly wavy lines for branches
- Draw a small rectangle at the bottom for the trunk
Mini Case Study: In one holiday card project, I used uneven wavy edges for the branches, and people commented that the tree looked “alive.” Simple detail can make a huge difference.
Advanced Tip: Add some branch tips extending outside the main triangle for extra realism.
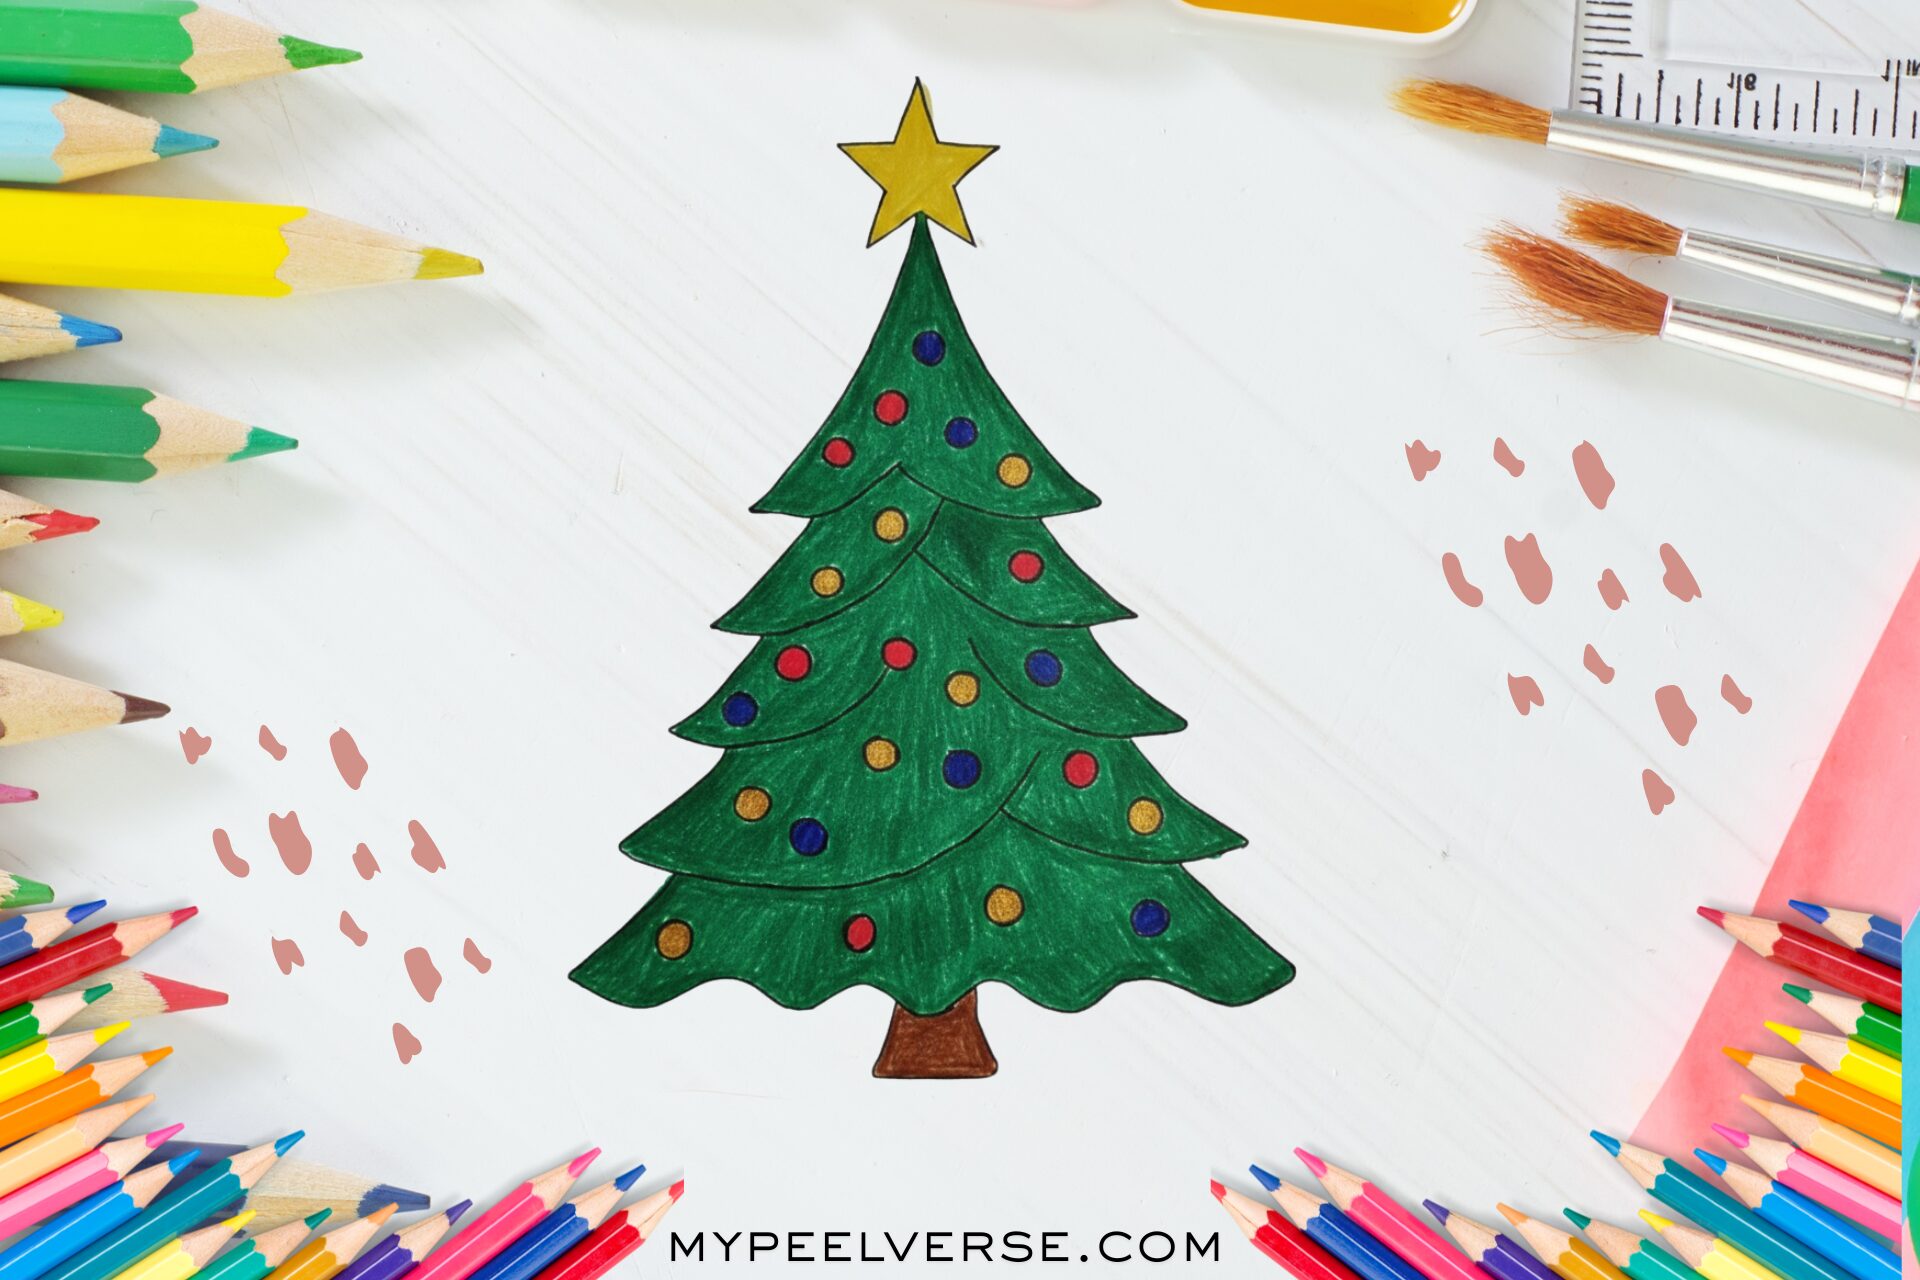
Step 4: Add a Star on Top
Draw a 5-pointed star at the top of the tree. You can make it simple or ornate.
Fun Tip: Tilt the star slightly for a playful, whimsical look. It doesn’t need to be perfect.
Troubleshooting: If the star looks too big, redraw it smaller. The tip of the triangle should remain visible.
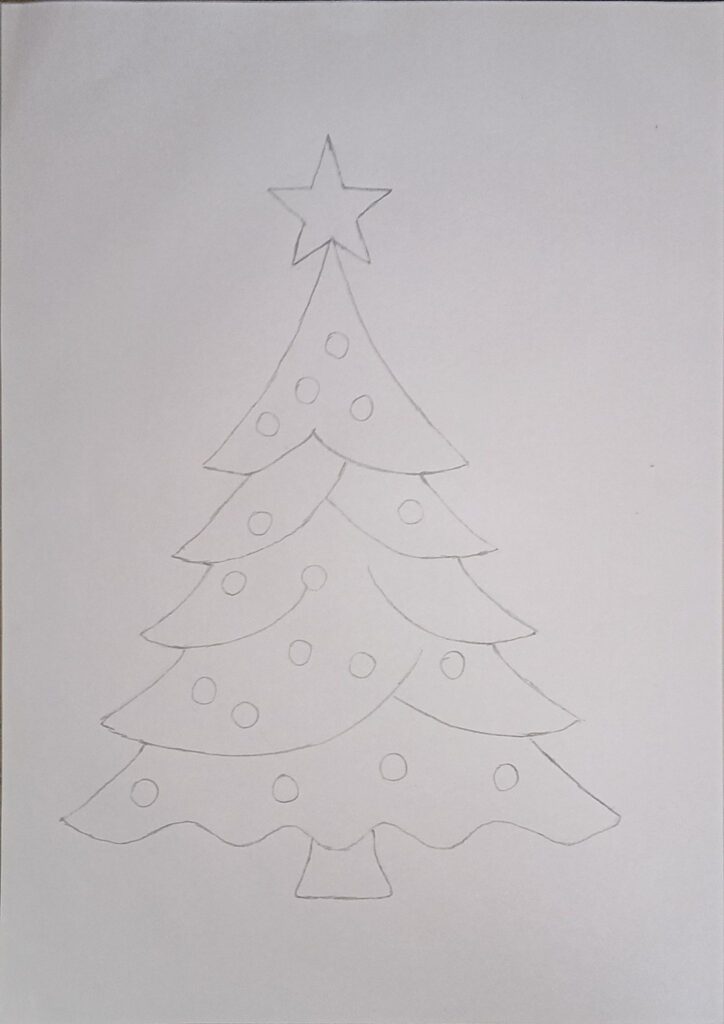
Step 5: Add Decorations
Now the fun part: ornaments, garlands, and lights.
- Draw small circles for baubles
- Wavy lines for garlands
- Tiny stars or dots for lights
Advanced Decoration Tip: Layer decorations. Draw lights first, then ornaments on top. This creates depth.
Mini Example: One year, I layered shiny gold and red baubles on my drawing. The tree instantly looked more festive and vibrant.
Common Mistake: Placing all ornaments in a straight line. Instead, stagger them to make it look natural.
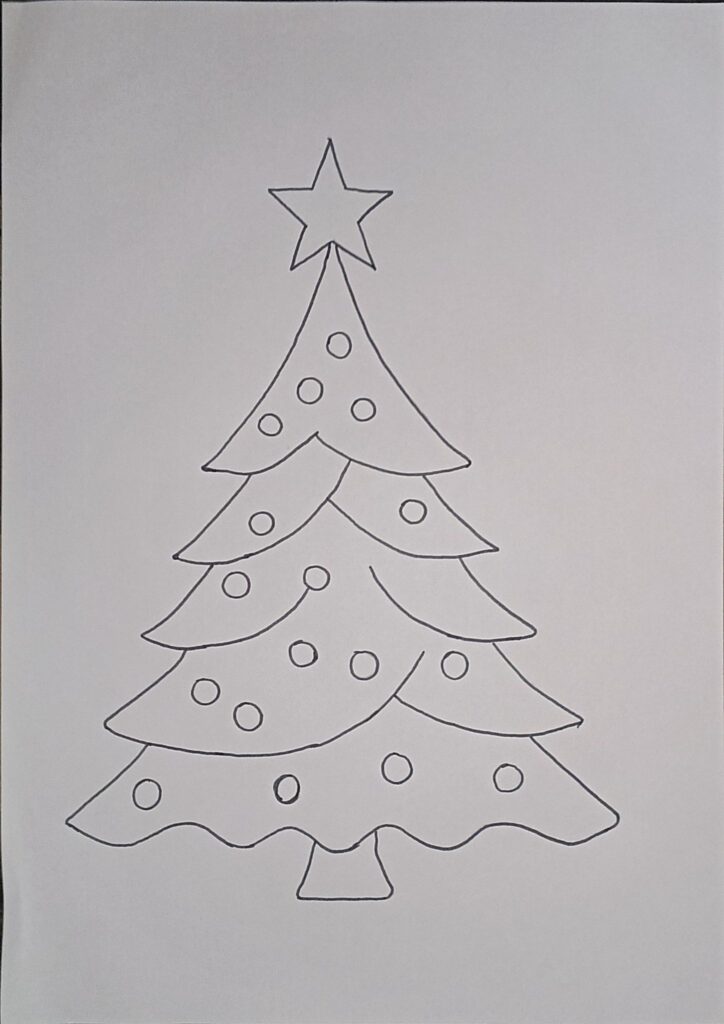
Step 6: Outline Your Drawing
Use a black pen or fineliner to outline your tree, star, and decorations.
- Go slow on detailed areas like the branches
- Avoid heavy pressure—light lines for leaves and needles look natural
Erase any pencil marks left behind.
Pro Tip: Outline in stages start with the main triangle and trunk, then add layers, star, and finally decorations.
Step 7: Color Your Christmas Tree
Start coloring in layers:
- Tree: green (use dark green at edges for depth)
- Trunk: brown
- Star: yellow
- Ornaments: red, gold, blue, or your choice
Advanced Tip: Blend colors for shadows and highlights. Light green in the center, dark green on the edges gives a 3D effect.
Mini Case Study: I once drew two versions of a tree—flat green vs layered shading. The shaded version looked 3x more festive, even with the same decorations.
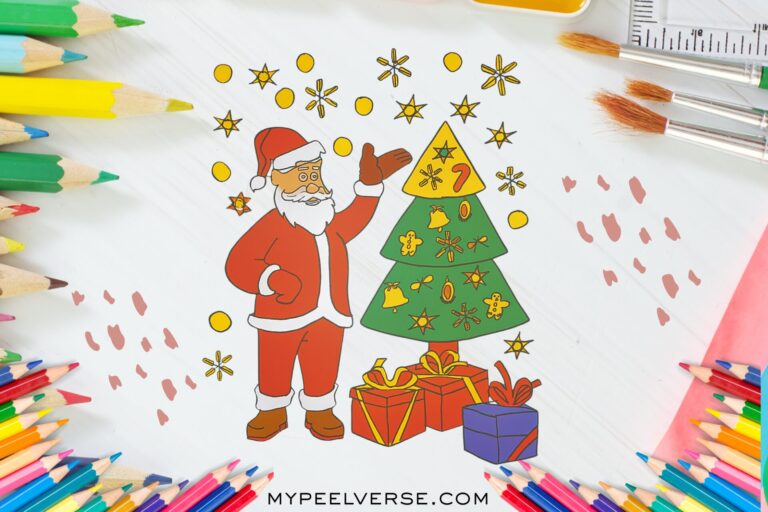
Step 8: Add Background or Scene (Optional)
Once your tree is done, you can add extra elements:
- Snowflakes falling in the background
- Gifts under the tree
- Santa or reindeer nearby
This turns your drawing into a complete Christmas scene.
Advanced Tip: Use light blue or grey for shadows behind the tree for depth.
Beginner Tips & Tricks
- Start light: Always sketch lightly with a pencil first.
- Don’t stress about perfection: Uneven branches add character.
- Add personality: Tilted star, wiggly branches, unique ornament patterns.
- Practice shapes: Draw small triangles and circles separately before full tree.
- Step back and review: Occasionally look at your drawing from a distance—it helps spot mistakes.
Common Mistakes and How to Fix Them
- Tree looks flat: Add wavy edges and shading.
- Star too big: Make it smaller than the top triangle.
- Ornaments aligned too perfectly: Stagger them naturally.
- Branches look empty: Add smaller inner branches or lights.
Frequently Asked Questions
Q1: Can I draw a Christmas tree without markers?
Yes! Colored pencils, crayons, or watercolors work perfectly. Layer colors to add depth.
Q2: How long does it take to draw a Christmas tree?
Beginners: 15–30 minutes
Advanced: 45–60 minutes for detailed designs
Q3: Can I make the tree funny or cute?
Yes! Exaggerate the star, branches, or ornaments for a cartoon style.
Q4: Should I copy the drawing exactly?
No. Use this guide as a base and personalize your design.
Q5: Can I combine the tree with other Christmas elements?
Absolutely! Santa, gifts, reindeer, or snow enhance the scene.
Q6: How do I make the tree 3D-looking?
Add shading along branch edges, use darker green for edges, and lighter green toward the center.
Q7: What’s the easiest way to draw ornaments?
Simple circles or small stars are enough. Add highlights with a white pencil or gel pen.
Q8: Can I draw multiple trees in one scene?
Yes! Draw small triangles in the background to create a forest effect.
Conclusion
And that’s how you draw a Christmas tree in a fun, step-by-step, beginner-friendly way.
Start with the basic triangle, add layers, outline, star, and decorations, then color. Extra details like shading, gifts, or snowflakes take your drawing from simple to professional-looking.
Remember, every tree is unique. The magic is in adding your own personal touches.
Related Guides You Might Like: