How to Draw a Boat Step by Step: A Complete Beginner-Friendly Guide
Drawing a boat looks simple until you try to make the curves smooth, the hull balanced, and the water believable. The good news? You only need a few clear steps, some patience, and the right structure.
In this guide, you’ll learn how to draw a boat using simple shapes, clean lines, and a sequence that even absolute beginners can follow. You’ll also find small tips, practical corrections, and common mistakes I’ve seen hundreds of learners make.
Throughout this guide, you’ll notice short explanations, friendly steps, and a process that builds confidence as you go. That intentional drawing becomes easier when instructions don’t overwhelm you.
1. Start With the Hull Shape
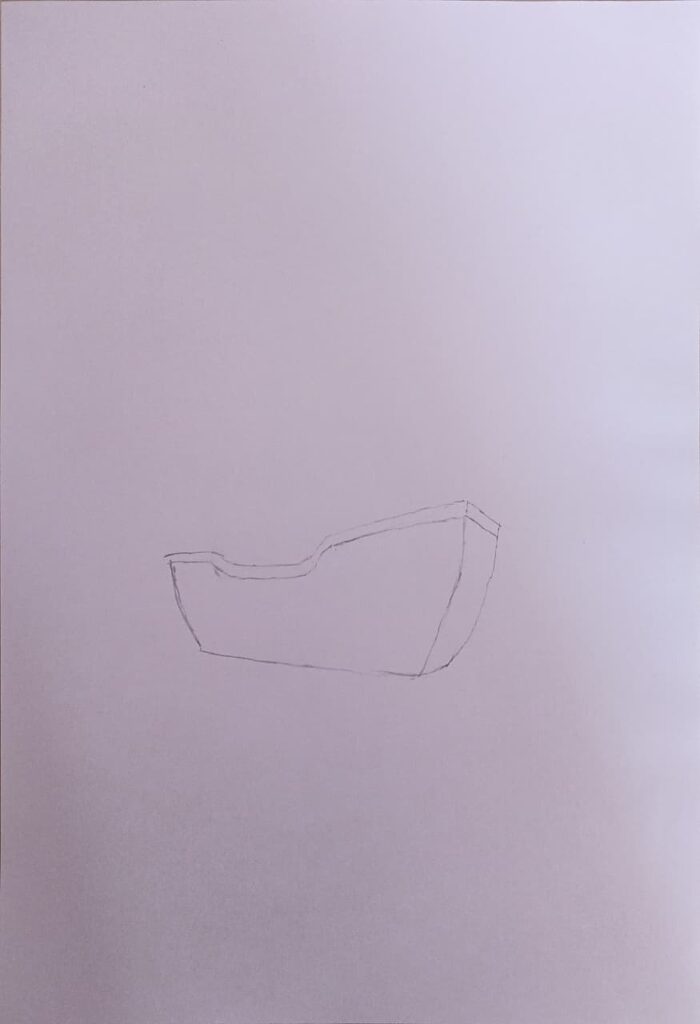
A boat begins with its base the hull. When you get this shape right, the rest flows naturally.
Step-by-step
- Draw a long, slightly curved horizontal line.
- Add a matching curve underneath, creating an almond or “eye” shape.
- Extend the sides slightly to make the hull appear longer.
Tip: Beginners often make the hull too flat. A gentle curve adds life.
Why this matters: The hull sets your proportion, direction, and balance. Everything else attaches to it.
2. Add the Side Walls and Deck
Once the hull feels right, you can begin building upward. Think of this as sketching the “walls” of the boat.
Step-by-step
- Draw two short vertical lines from each end of the hull.
- Connect them with a slightly curved line across the top.
- Lighten your previous lines if needed to keep the drawing clean.
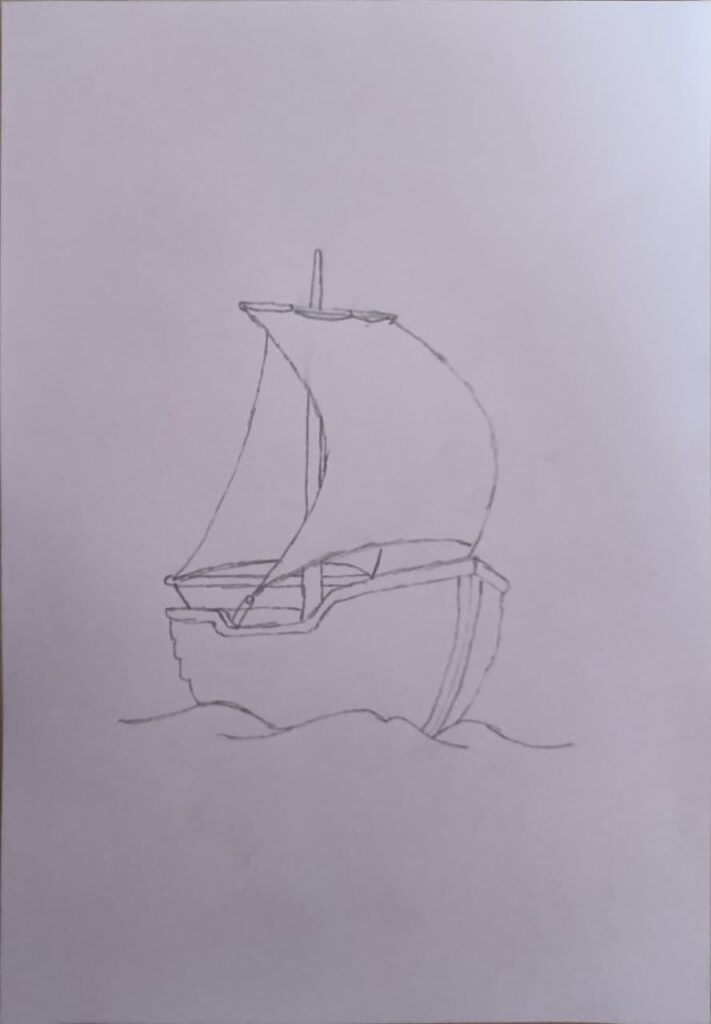
Beginner note: Don’t make the walls too tall. A small height keeps the drawing realistic.
3. Sketch the Cabin or Sail (Choose Your Style)
Boats come in many types: sailboats, speedboats, rowboats.
Pick one:
Option A Sailboat
- Draw a tall mast in the middle.
- Add a large triangle for the main sail.
- Add a smaller triangle in front for the foresail.
Option B — Motorboat
- Add a small box-shaped cabin.
- Sketch round windows.
- Add a simple roof.
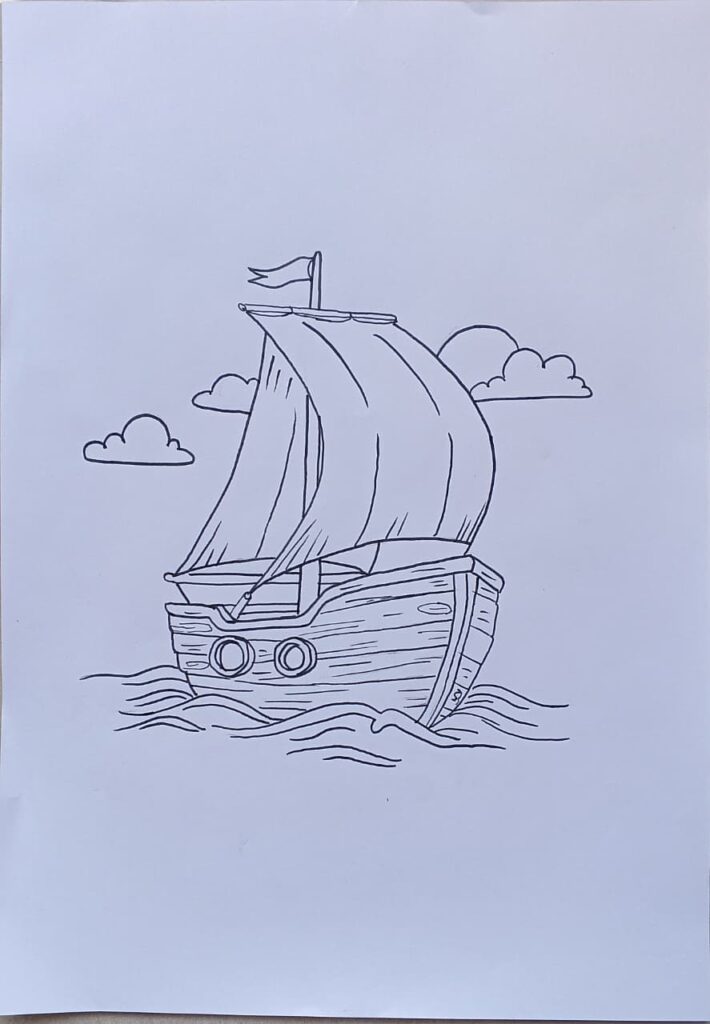
4 Draw Water & Create Movement
Water doesn’t need to be complicated. Simple, shallow lines are enough.
Step-by-step
- Add wavy lines under the hull.
- Keep the waves uneven, natural water isn’t symmetrical.
- Add two or three ripples behind the boat to show movement.
Common mistake:
Avoid thick, dark water lines. Keep them light and airy.
5 Finalize With Shading or Color
Whether you shade or color depends on your style. Here’s a simple approach:
Shading
- Darken the underside of the hull
- Shade lightly along the side facing away from the sun
- Add deeper shadows under the deck roof
Coloring
- Shades of brown or red for wooden boats
- Blue and white for sailboats
- Choose soft blues for water
- Leave some areas white for highlights
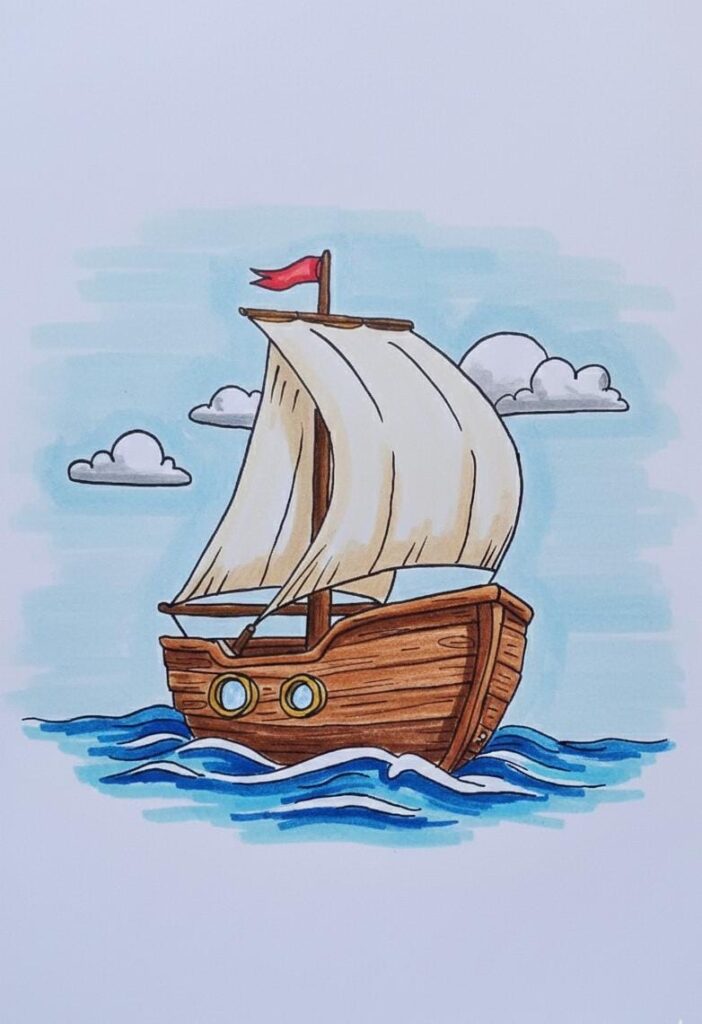
Tip:
Don’t color the entire sea. Light touches give a more natural effect.
Common Mistakes Beginners Make
1. Uneven Hull Shape
Solution: Use two light guide curves before darkening the final shape.
2. Tilted Boat
Solution: Draw a horizontal reference line for balance.
3. Over-detailed Water
Solution: Keep waves simple. Fewer lines look better.
4. Crooked Mast
Solution: Use a straight vertical line through the center.
My Personal Learning Notes
I’ve taught this boat drawing method many times. Three things always help:
1. Start with the big shapes
Small details make sense only after the main structure feels balanced.
2. Keep the pencil pressure light
A heavy hand makes it hard to adjust curves.
3. Don’t aim for perfect symmetry
Natural boats have slight imperfections, especially hand-drawn ones.
Frequently Asked Questions
1. How long does it take to draw a boat?
Beginners usually finish in 10–15 minutes following this guide.
2. Which pencil should I use?
A simple HB pencil works perfectly.
3. How do I draw water realistically?
Use thin, broken lines not full waves.
4. Can kids follow this tutorial?
Yes. The steps are simple enough for ages 6+.
5. What if I want a more advanced boat?
Start with this basic form, then add layers of detail slowly.
Final Thoughts: Your Boat Drawing Journey Starts Here
Drawing a boat is a great way to learn curves, balance, and simple perspective. With each attempt, you’ll notice smoother lines and better shapes. Most artists start with simple forms like this and grow from there.
Take your time. Enjoy the process. And if you draw this boat a few times, you’ll feel your control and confidence improve naturally.