How to Draw a Jack-O’-Lantern — Step-by-Step Guide for Beginners (2025 Edition)
Why Drawing a Jack-O’-Lantern Still Matters in 2025
In 2025, drawing a Jack-O’-Lantern still matters, blending tradition with modern creativity for Halloween enthusiasts and artists alike Every October, pumpkins transform from humble vegetables into the glowing symbols of creativity and mystery we call Jack-O’-Lanterns. For centuries, people have carved, painted, and drawn these faces as part of Halloween’s charm. But in 2025, when TikTok artists and Procreate illustrators are redefining seasonal art, learning how to draw a Jack-O’-Lantern is not just a fun project, it’s a skill that connects tradition with modern creativity.
Whether you want to sketch your first Halloween pumpkin, post spooky digital art on Instagram, or sell seasonal prints on Etsy, this guide will take you step-by-step from rough sketch to glowing finish. You’ll learn about proportions, shading, light sources, and even how to style your pumpkin for different moods: cute, creepy, or classic.
Step 1: Understand the Pumpkin’s Anatomy
Whether you’re drawing a Jack-O’-Lantern on paper or digitally, this guide will help you create the perfect spooky pumpkin Before drawing, visualize what makes a pumpkin instantly recognizable: the round shape, ribbed surface, stem, and hollow interior glow when lit.
- Shape — Think of a slightly squashed sphere. Real pumpkins are never perfectly round; they bulge and tilt.
- Ridges — The vertical grooves that run from top to bottom give structure and depth.
- Stem — Usually crooked or angled, it defines where your light source sits.
- Face Area — The surface where you’ll later draw eyes, nose, and mouth.
Pro Tip: For beginners, start with a slightly oval outline. It gives you more space to add expressive facial features.
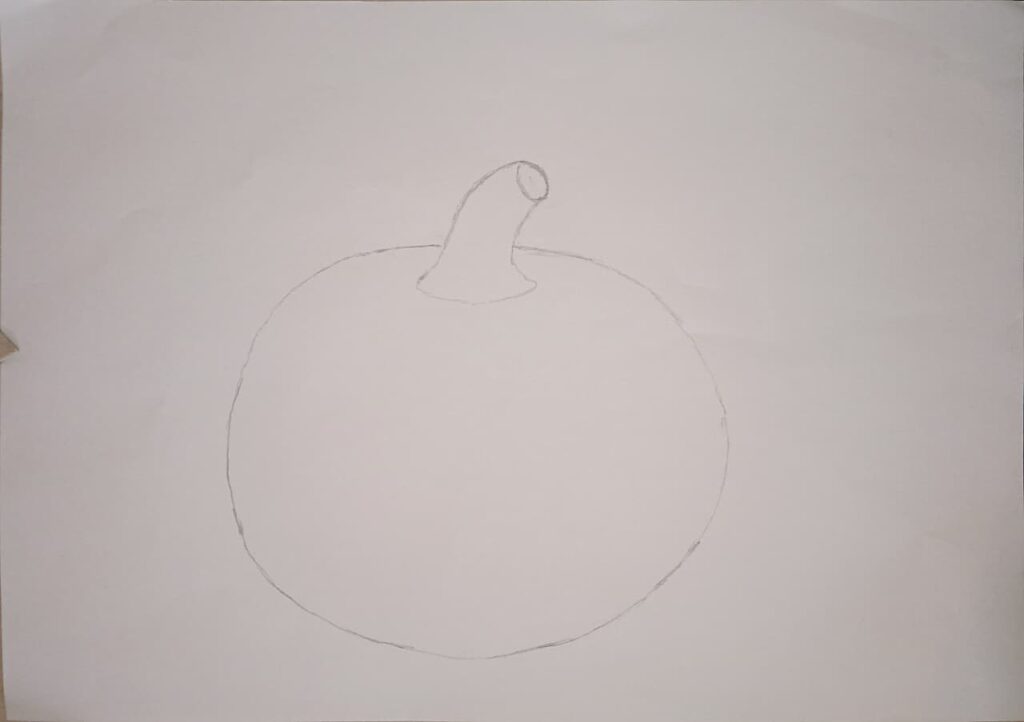
Step 2: Sketch the Base Shape of Your Jack-O’-Lantern
Traditional Tools
Use a 2B pencil for light outlines. Draw a circle or oval and gently flatten the top and bottom. Add a small rectangle for the stem, slightly tilted.
Digital Tools
If you’re drawing on an iPad or tablet (Procreate, Krita, Clip Studio), choose a soft sketch brush. Lower opacity to 50%. Draw the same oval base on a separate layer to keep things editable.
Don’t worry about perfection here. The charm of a Jack-O’-Lantern lies in its imperfections.
Step 3: Add Ridges and Volume
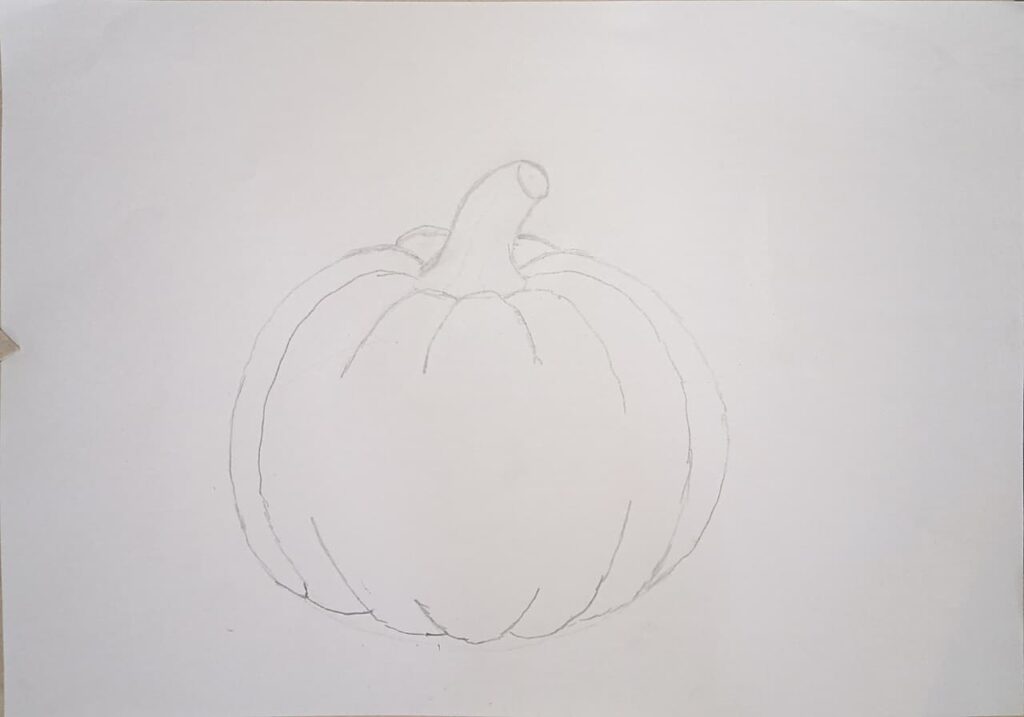
Divide the pumpkin into 6–8 curved vertical sections; these are your ridges. Each line should curve slightly toward the stem, following the pumpkin’s natural bulge.
- Keep the middle ridges wider.
- Make side ridges thinner and more curved to show perspective.
Now lightly shade the spaces between ridges to give a sense of roundness.
Artist Insight: In real pumpkins, ridges catch light differently. You can exaggerate this in your drawing to make it more 3D.
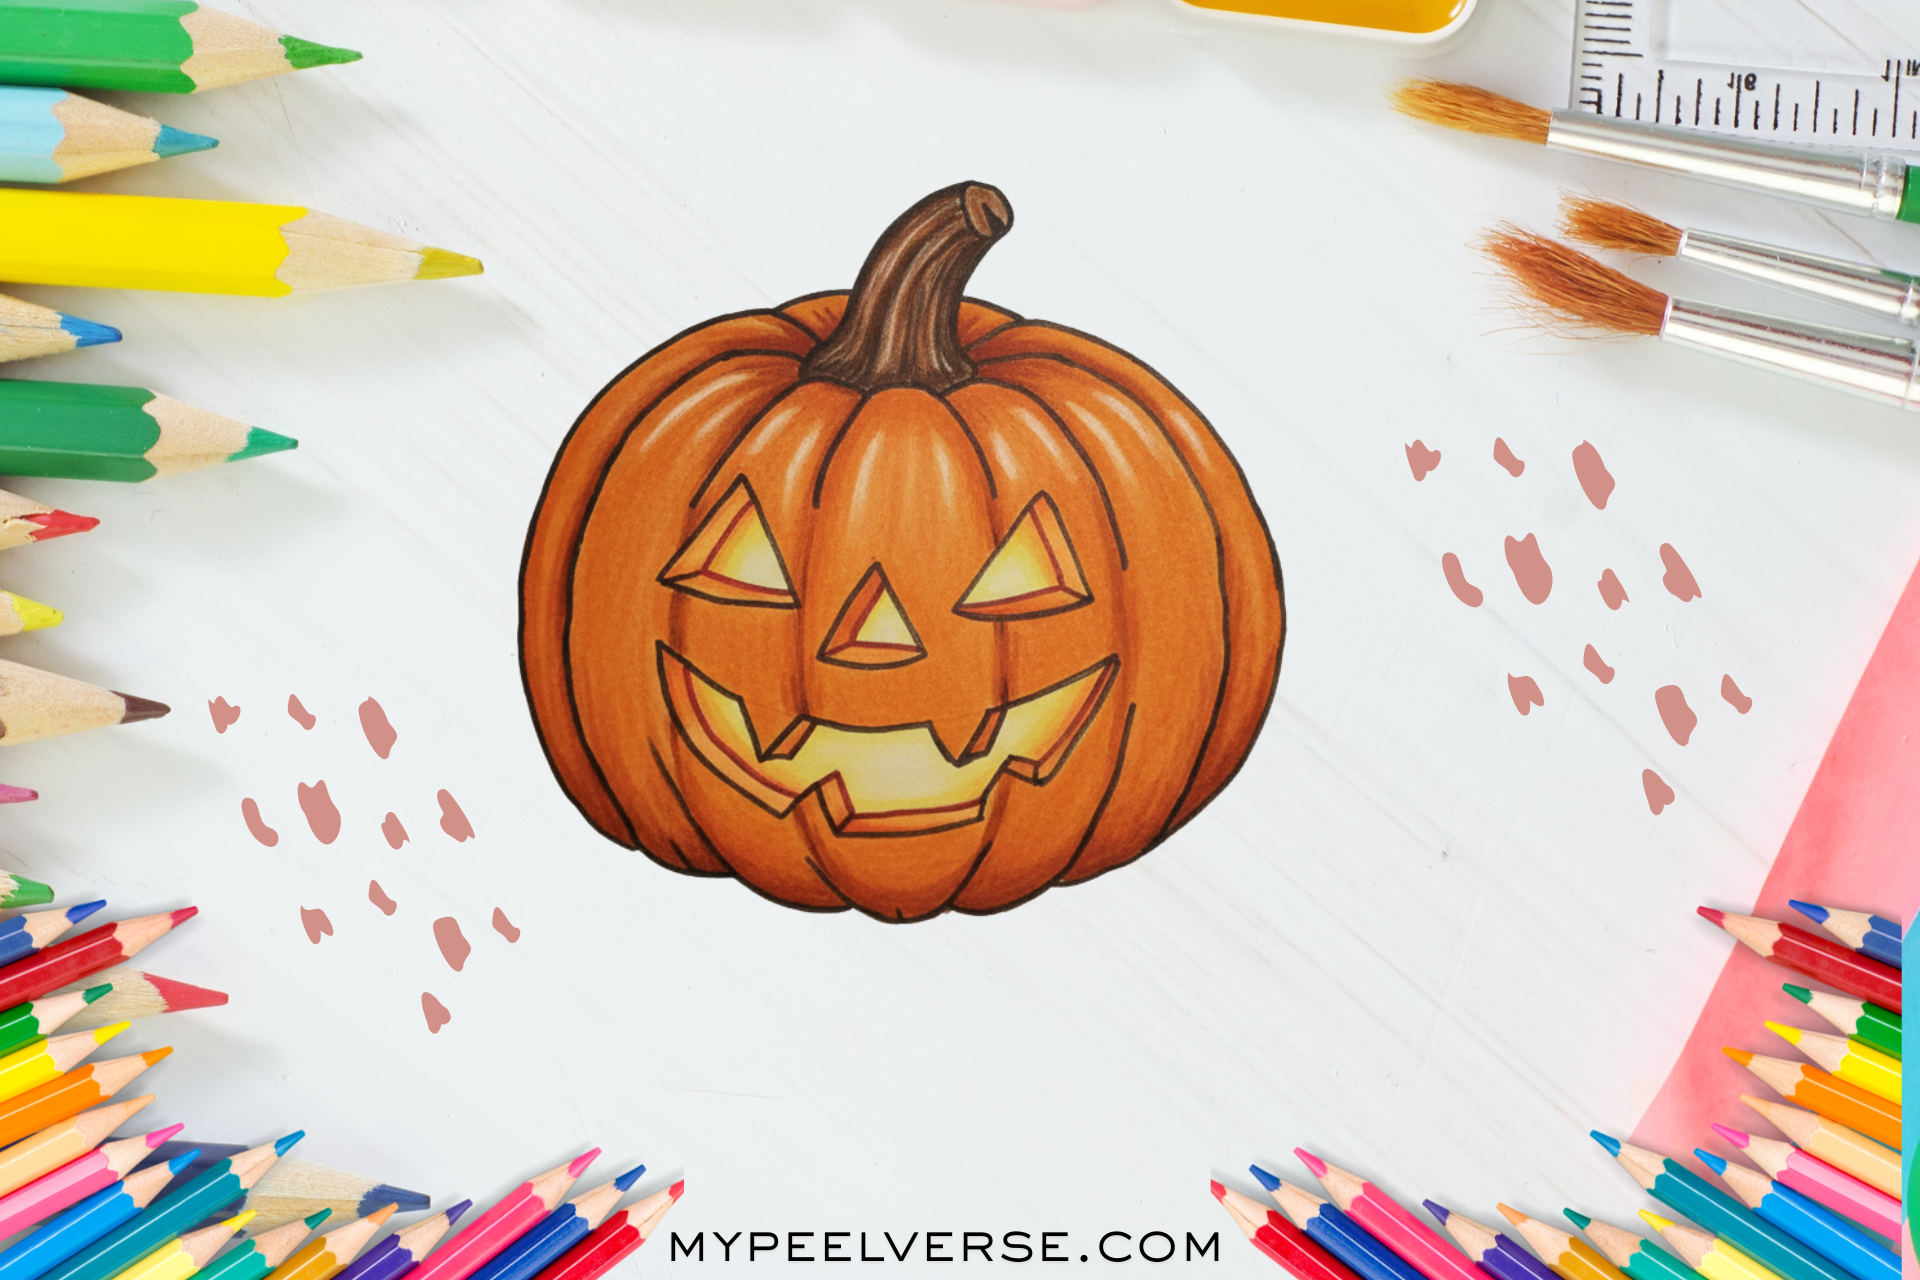
Step 4: Design the Face Choose Your Jack-O’-Lantern Personality
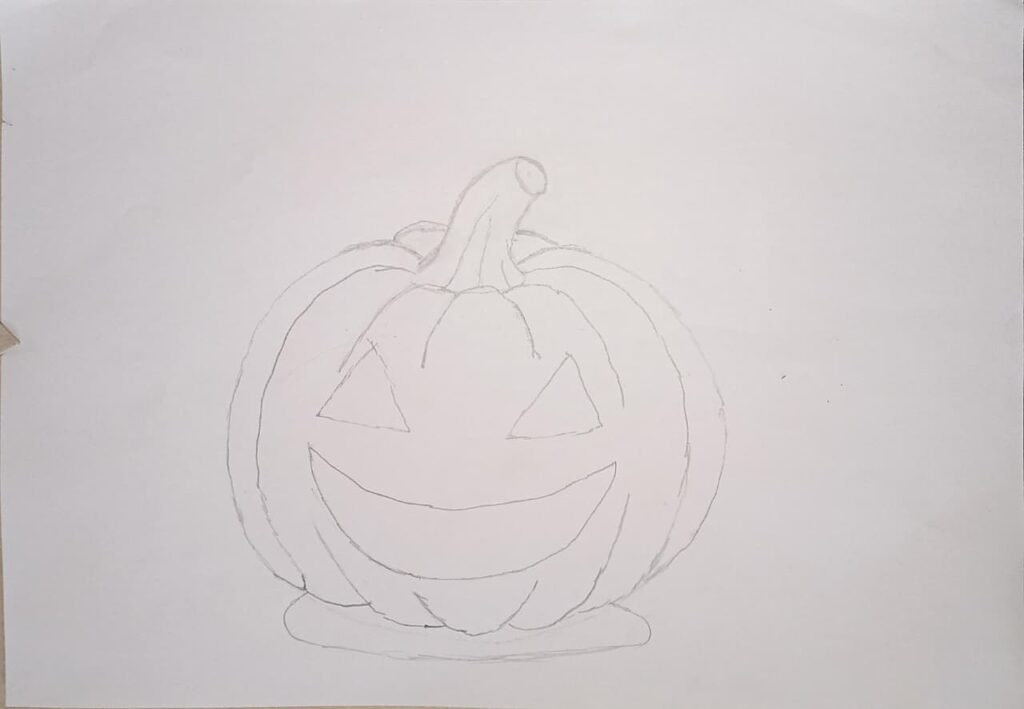
The fun begins here! A Jack-O’-Lantern’s personality depends entirely on its expression.
Common styles:
- Classic Triangle eyes, triangle nose, jagged smile.
- Cute Big circular eyes with highlights, rounded mouth with small teeth.
- Creepy Sharp, exaggerated angles, tilted features, and uneven teeth.
- Realistic Slight asymmetry, natural carved look, shadow details.
Start by drawing the eyes halfway down the pumpkin. Then sketch the nose just below and the mouth wide and curved.
Digital artists: Use symmetry tools only at first. Later, turn them off to make it look hand-made.
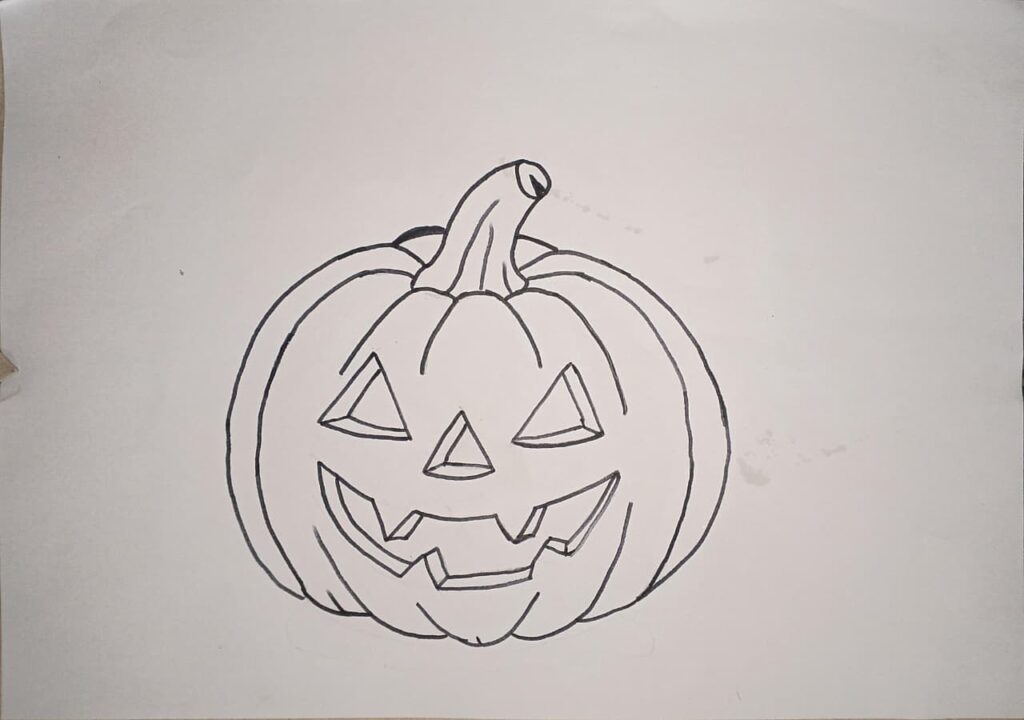
Step 5: Refine the Line Art
Once you’re satisfied with the sketch, go over your lines cleanly:
- Traditional: use an ink pen or fineliner.
- Digital: switch to a hard round brush and create a new inking layer.
Vary line thickness thicker around shadows, thinner where light hits. This gives life and realism.
Pro Tip: Avoid outlining the face features too sharply; slightly fading lines where light would glow helps your lantern look illuminated even before coloring.
Step 6: Light, Shadow, and Glow (Bringing It to Life)
Lighting is what transforms your flat pumpkin into a glowing Jack-O’-Lantern.
Step-by-Step Lighting Technique
- Decide Light Source Imagine a candle inside the pumpkin. The light spills out through the eyes and mouth.
- Highlight Edges Around the carved areas, add a soft yellow-orange glow.
- Shadow Zones Shade the outer curves with darker oranges or browns.
- Stem Shadows Cast subtle shadows from the stem down onto the pumpkin’s body.
Color Tip:
- For glow, use soft orange + yellow gradients.
- For outer shading, add deep orange, sienna, or brown.
- To intensify the spooky feel, lightly glaze the background in dark blue or gray.
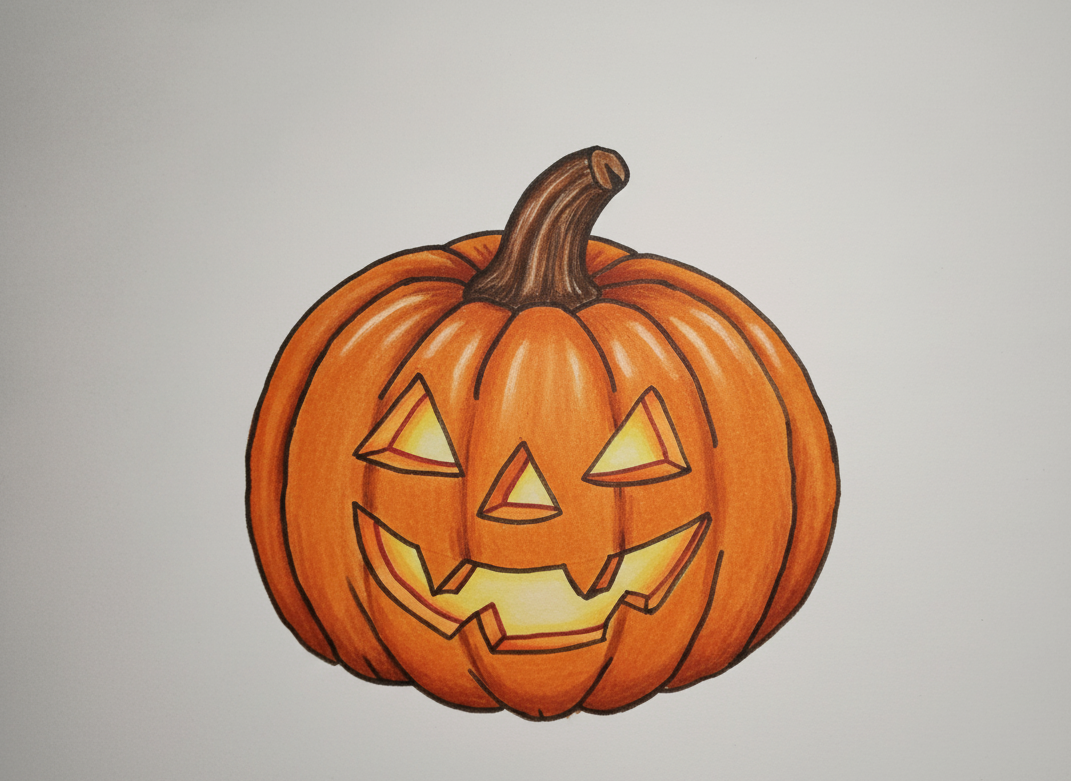
Step 7: Coloring Traditional vs. Digital
Traditional Coloring:
Use colored pencils or markers. Start with a base orange, then layer darker shades along the ridges. Add touches of red or brown for depth. Blend using a blending stump or tissue.
Digital Coloring:
Add color layers below your line art.
- Base layer: orange fill
- Shadow layer (multiply mode): darker orange
- Glow layer (screen mode): yellow/white gradients around the face
Quick Fix: If your pumpkin looks flat, boost contrast by deepening the inner edges of the ridges and brightening the outer ones.
Step 8: Add Background or Scene (Optional)
Your Jack-O’-Lantern doesn’t have to float on a white background. Try placing it in a simple environment:
- A night sky with stars or fog
- A porch with fallen leaves
- A digital gradient with Halloween tones (purple, black, orange)
Adding even a minimal background helps tell a story and makes your artwork more shareable online.
Step 9: Troubleshooting Fixing Common Mistakes
Even experienced artists struggle with pumpkin proportions and symmetry. Here’s a quick reference:
| Problem | Why It Happens | Quick Fix |
| Pumpkin looks flat | Ridges too straight | Curve ridges inward near stem |
| Expression looks off | Eyes too far apart or too high | Keep eyes centered horizontally |
| Glow looks dull | No contrast between light & dark | Add deeper shadow around glowing areas |
| Face feels “stuck on” | Features not following curvature | Slightly tilt and curve face lines along pumpkin form |
Remember: The key to realism is subtle asymmetry: no real pumpkin is perfect!
Step 10: Add Texture & Final Polish
Texture sells realism. Add tiny speckles, imperfections, and subtle bumps.
- Use cross-hatching or small stippling marks in pencil art.
- In digital, try noise or texture brushes for natural grain.
- Add a light gradient overlay to simulate candlelight flicker.
When done, take a step back. Your pumpkin should look dimensional, glowing, and full of Halloween energy.
Bonus Section: Style Variations for Inspiration
1. Cartoon Style: Use bold outlines, exaggerated smiles, and bright flat colors. Perfect for kids’ books or stickers.
2. Realistic Style: Focus on gradients, soft edges, and light falloff. Ideal for digital paintings.
3. Gothic / Horror Style: Deep shadows, cracked textures, eerie green lighting. Works for concept art or posters.
4. Minimal Line Art: Simple contour drawing great for tattoo or icon design.
Each variation reflects your artistic mood and audience. Don’t stick to one experiment with several!
Step 11: Choosing the Right Tools Traditional vs. Digital vs. AI Assist
Your tools shape your creative flow. In 2025, artists use everything from graphite pencils to AI sketch enhancers. Let’s break down what works best for each level.
Traditional Tools (For tactile learners)
- Pencils: HB for outlines, 2B–4B for shading.
- Markers: Copic, Ohuhu, or Tombow for smooth color transitions.
- Paper: 180–250 GSM sketch paper or Bristol board to avoid bleeding.
- Lighting Tip: Draw near a window or use a small desk lamp to mimic the inner glow.
Pros: Natural feel, great for hand control and shading practice.
Cons: Harder to edit mistakes and less vibrant glow effects.
Digital Tools (For modern creators)
- Procreate (iPad) Most popular; offers symmetry, blend modes, and texture brushes.
- Krita (PC/Mac) Free and open source, with professional brush sets.
- Clip Studio Paint Great for manga/anime-style pumpkin faces.
Pros: Undo/redo freedom, instant color control, and glow effects.
Cons: Requires stylus sensitivity and screen pressure adjustment.
AI & Hybrid Tools (For speed + creativity)
- Adobe Firefly, Ideogram, or DALL·E Sketch Mode now allows semi-manual art creation. You can draw a base pumpkin and let AI auto-generate lighting, color, or background.
- Ideal for brainstorming multiple concepts quickly or building printable variations for Halloween campaigns.
Pro Tip: AI tools are best used as assistants, not replacements. Draw the base structure yourself for authenticity.
Step 12: Drawing a Jack-O’-Lantern in Procreate (Hands-On Mini Guide)
If you’re using Procreate, here’s a 7-layer workflow you can follow:
- Layer 1 – Sketch: Draw your oval base using a soft pencil brush.
- Layer 2 – Inking: Use a hard round or technical pen for clean lines.
- Layer 3 – Base Color: Fill with flat orange using a large soft brush.
- Layer 4 – Shadows: Set blend mode to Multiply; paint dark oranges or browns.
- Layer 5 – Highlights: Add yellow-orange strokes on ridges for dimension.
- Layer 6 – Glow: Use soft airbrush in Screen Mode to create candlelight glow inside the face.
- Layer 7 – Background: Add simple gradient (purple-black) or scene elements like fog or stars.
Shortcuts:
- Double-tap with two fingers to undo.
- Hold your finger on color to pick tone from canvas.
- Use Gaussian Blur for smooth glow transitions.
Your result will look like a hand-lit, realistic pumpkin illustration perfect for Instagram or digital prints.
Step 13: Creative Variations Beyond the Classic Pumpkin
Now that you’ve mastered the fundamentals, try these creative twists:
1. Emotion Pumpkins
Draw multiple pumpkins with unique expressions joy, anger, surprise, fear. Great for animation or sticker packs.
2. Haunted Scene Integration
Sketch your Jack-O’-Lantern as part of a haunted house scene or graveyard background for storytelling depth.
3. Digital Neon Style
Use Procreate’s “Light Pen” brush to outline features in glowing neon blue, purple, or green for futuristic Halloween art.
4. Realistic Carved Texture
Add subtle cracks, surface imperfections, and flickering candlelight to simulate a real carved pumpkin. Use low-opacity texture brushes.
5. Character Mashups
Combine Naruto, Goku, or any pop-culture character’s face with a pumpkin structure for viral fan art. These hybrids perform extremely well on TikTok and Pinterest.
Step 14: Monetizing Your Jack-O’-Lantern Art
Your pumpkin drawings aren’t just for fun they can earn you income during Halloween season. Here’s how:
1. Sell Digital Prints or Stickers (Etsy, Gumroad, Redbubble)
- Create 3–5 Jack-O’-Lantern designs with different moods.
- Export them as transparent PNGs (300 DPI).
- Bundle them as a “Halloween Digital Pack” on Etsy or Gumroad.
Keyword Tip: Use titles like “Spooky Pumpkin Clipart 2025” or “Cute Jack-O’-Lantern Printable Art.”
2. Social Media Monetization (TikTok, Instagram Reels)
Turn your drawing process into short timelapse videos.
- Add ambient Halloween music.
- Post with hashtags like #HalloweenArt #JackOLanternDrawing #DigitalArtist2025.
- Include affiliate links for art tools you use.
3. Freelance & Seasonal Commissions
Offer custom Halloween avatar illustrations or spooky logo designs.
Clients love pumpkin-themed visuals for limited-time campaigns.
4. AI & NFT Crossovers (optional advanced)
If you work in digital art, generate multiple pumpkin variations using AI and sell unique editions as collectibles (e.g., NFT or AR filters).
Step 15: Seasonal Timing & Art Trends (2025 Insights)
Trend #1: Neon + Glowing Line Art
Searches for “glow art” and “neon pumpkin design” have tripled on TikTok. Artists use bright outlines to mimic LED lights.
Trend #2: Hand-Drawn + Digital Hybrid
Creators sketch pumpkins traditionally, then color and animate them digitally for Reels. This “mixed media” style builds authenticity.
Trend #3: Cozy Aesthetic Halloween
A rising trend in 2025 — soft oranges, neutral tones, and gentle faces rather than horror. Perfect for family-friendly content.
Trend #4: AI Collaboration Sketches
Artists start with hand sketches and finish with AI lighting. Viewers love the “AI-enhanced realism” concept.
Trend #5: Seasonal Tutorials with Monetization Hooks
Long-form art guides that teach and sell at the same time (like this one!) are ranking high in Google’s AI Overviews.
Step 16: FAQs
Q1: How can I make my Jack-O’-Lantern look realistic?
Focus on lighting. Add inner glow and shadow contrast. Avoid flat coloring—blend soft orange and yellow tones near the carved edges.
Q2: What’s the best brush for digital pumpkin art?
In Procreate, the Soft Airbrush for glow and Technical Pen for line work. In Krita, use the Dry Bristle for natural shading.
Q3: Can I draw a Jack-O’-Lantern without color?
Yes! Black-and-white line art pumpkins are great for tattoo designs, logos, or coloring books.
Q4: How long does it take to draw one?
Beginners: 20–40 minutes. Intermediate: 1 hour with shading. Digital pros: under 15 minutes using layers and shortcuts.
Q5: Can I sell pumpkin art I create?
Absolutely. As long as it’s your own drawing (not traced or AI-only generated), you can sell it as digital prints or assets.
Step 17: Final Artist Tips Make It Yours
- Imperfect = Beautiful. Slight tilt in eyes or uneven smile adds character.
- Avoid over-detailing early. Block in major shapes first, refine later.
- Add light last. Glow and highlights define realism.
- Create seasonal consistency. Draw pumpkins in multiple moods for a portfolio (happy, scary, sleepy).
- Save and sign your work. Even digital art deserves a signature—protect your creations.
Conclusion: Why Drawing a Jack-O’-Lantern Builds Creative Confidence
Drawing a Jack-O’-Lantern is more than a Halloween hobby—it’s an artist’s annual ritual of expression. Each curved ridge, flickering glow, and carved grin reflects your imagination. Whether you draw for fun, social media, or profit, every sketch sharpens your skills and your creative storytelling.
So, grab your pencil or your stylus and create your own glowing masterpiece this season.
Because when the candlelight flickers inside your art, it’s not just Halloween that shines.
It’s your creativity coming alive. Stay tuned with My Peel Verse